Showing posts with label Kitchen. Show all posts

Wednesday, May 6, 2009

Fixing a Leaking Sink Drain

Leaking plumbing is never fun to deal with, but at least when a drain leaks, the water is not pressurized like with a water line leak.

I recently discovered a slow leak from one of the two drains in our kitchen sink. Unfortunately, this was a drain I installed seven months ago, so I was fixing a problem I created. Ah, such is the life of a do-it-yourself person!

Find the Leak
The first step in fixing a leaking drain is determining where the leak is coming from. This may not always be as simple as finding the water droplets, because the droplets of water can travel far from the leak location before they fall to the ground. Keep in mind that water obeys the law of gravity, so if you follow a water trail up to its highest point, that will usually be the source of the leak.

The blue arrow in this photo shows where some water was collecting. The PVC pipe above was also wet. The pipes and drain to the left were completely dry, so I knew they were not the culprit. After using a flashlight, I could see that the drain itself was leaking, not the pipes.

Fixing a Leaking Sink Drain
Now that I knew what part of the drainage system under the sink was leaking, it was only a matter of fixing it before it got any worse.

Luckily for me, this was a quick fix. I would only need three things:
  1. Plumber's Putty
  2. Teflon (Plumber's) Tape
  3. Channel Lock Pliers
1. Place a large bowl or small bucket under the pipes to catch any water.
2. In order to remove the drain, I had to first unscrew the first connector (first photo).
3. Then, I removed the 'T' section of PVC pipe (second photo).
This 'T' section has a splash shield in it that prevents water coming from the left arm to splash up and out of the top opening. When reinstalling, make sure it is installed correctly.

At this time, I took the 'T' section outside and used our garden hose to flush it out and clean it. This step is not necessary, but I figured that I might as well do it while I can.

4. I now had access to the drain. The drain is attached to the bottom of the sink by a large nut. Between the nut and sink is a washer. Unscrew the large nut and place the nut and washer off to the side.

5. The drain is now free, all that has to be done is to lift it out of the sink. The plumber's putty may offer a little resistance, so if you are having trouble, try twisting the drain a little to break the putty's hold.

I have seen some people use silicone adhesive caulk instead of plumber's putty.
The silicone caulk will ensure the drain is water proof and secure, but once it adheres, you will not be able to remove the drain. This would be especially bad if your sink is like ours and is made out of solid surface material because it can lead to a cracked sink.

6. Remove all traces of old plumber's putty from both the sink and the drain. The old putty may be reused if it has not hardened.

7. Apply a bead of plumber's putty around the collar of the drain. There should be enough putty to make a good seal. When you install the drain, some putty should be squeezed out, if not, there is not enough putty.

8. Reinstall the large washer and the drain nut. Tighten. I then used a rag to clean all traces of putty in the sink. A good way to judge whether you have enough putty and the drain is tight enough is by looking at how flush the collar of the drain is to the bottom of the sink. If the collar sticks out past the bottom of the sink, then there is either too much putty or the drain has not been tightened down enough.

9. Wrap the threads of the sink drain and all the threaded portions of the PVC pipe with new Teflon tape (clean the old tape out first).

10. Reinstall the 'T' section of pipe and tighten all the fittings. That is it!

Friday, May 1, 2009

Remodeling the Kitchen - Part 5

Installing Ceramic Tile

In Part 1 of our kitchen remodeling adventure we saw what we had to work with.
In Part 2, we came up with a plan and started demolition.
In Part 3 we installed the subfloor and removed part of a wall.
In Part 4 we prepared the subfloor for the tile by laying cement backerboard.
In this Part we will install the ceramic tile!

Before a single tile can be installed it must be purchased. Sounds simple, right? It is simple if you know what to buy. There are a couple of things to keep in mind when purchasing tile for your renovation project.
  • Size of the tile
  • Type of tile
  • Color of tile
  • Tile layout plan
*Remember to purchase floor tiles; floor tiles are thicker and provide better traction than wall tile.
.
The size of the tile depends on the size of the room it will be installed in. If the tiles are too small for the room the percentage of grout lines to tiled floor could become too high and create a distracting pattern. On the other hand, tiles that are too large for the room can also look out of place. If you are not sure what size tiles you want there are a few things you can do that will aid your decision:
  • Ask an employee at a tile shop or home improvement center for advice
  • Look at other tiled rooms or rooms with vinyl floors with tile patterns
  • The most common tile size for most medium sized rooms will be about 12"
  • Smaller rooms, such as bathrooms, usually have 6" - 12" tiles
  • Large rooms with lots of open space can have 17" or larger tiles
While you are deciding on what size tile you want you should also plan the tile layout. The layout options are only limited by your creativity. The most common and the simplest layout is the grid design. You can also take the grid layout and rotate it 45 degrees so that your tiles run diagonally across the floor. Yet another popular layout is offsetting the tiles much like the layout of a brick wall. In addition to designs using one type of tile, you can incorporate boarder tiles, different colored tiles, or tiles set 45 degrees from the surrounding tiles.

We decided to use the simple grid pattern because it matched the simple country look we wanted for our new kitchen.

After finding the perfect tile at the perfect price at a home improvement store, we put the 1/2+ ton of tile, mortar, and grout in the back of our truck and drove home, eager to finally have a real floor in the kitchen.

The Layout
You want the tile to be centered and run square to the room. It will be noticeable if it is off center or is not square to the room.

1. Measure along one of the walls and find the center point. Mark this point, then do the same with the opposite wall. When you have the two points marked, snap a chalk line between the points, essentially dividing the room in half. Do the same with the other two walls. You should now have two chalk lines running perpendicular to each other and intersecting in the center of the room.
2. Dry lay a row of tiles along each chalk reference line. Keep in mind to leave a gap between the tiles the same distance you want your grout line thickness to be. We used 1/8" plastic tile spacers (sold at hardware stores) to ensure an even gap.
3. Adjust the reference lines as needed to best center the tiles in the room.
Material List
  1. Tile - you should have 10% more than you need (i.e. if you are tiling a 300 sq. ft. area, you should have 330 sq. ft. of tile on hand).
  2. Thinset mortar - Use gray if the grout will be dark or white if your grout will be light.
  3. Grout - There are many color options.
  4. Grout Sealer
  5. Silicon Caulk
  6. Wooden Board

Tool List
  1. Level - We used a 4' level.
  2. Goggles - When cutting tile
  3. Respirator - When cutting tile
  4. Knee Pads - You will definitely want these!
  5. Tile Cutter - For making straight cuts along the entire length of a tile.
  6. Wet Tile Saw or Angle Grinder with Diamond Cut-Off Wheel - For making non-straight cuts.
  7. Clamps - For holding tile while cutting it.
  8. Rubber Mallet
  9. Tile Spacers
  10. Sponges
  11. Clean Rags
  12. Rubber Grout Float
  13. Notched Trowel - For spreading thinset mortar
  14. Chalk Line - For making your reference marks.
  15. Tape Measure
  16. Large Bucket or Pan - to mix mortar and grout in.
  17. Caulk Gun - For caulking the perimeter of the room after the tile is laid.
  18. Mortar and Grout Mixer

Installing the Tile

The chances are astronomically high that at some point you will have to cut a tile to fit a space. I will discuss that later in this post, but for now I will guide you through the process we used to lay our tile floor.

1. First you need to get your thinset mortar prepared. Mix the mortar in a large pan or bucket with water until it is the consistency of thick, creamy peanut butter.
2. We started at the center (where our new chalk reference lines were) and worked in one quadrant of the room at a time. Spread some mortar onto the floor with the notched end of your trowel. There should barely be any mortar in the valleys created by the notched trowel. You should spread it so that the notches create even rows.
3. Firmly place the first tile down. Start laying the tile out, using the spacers in between them, being careful to keep the tiles lined up with each other. Clean any mortar that oozes out in between the tiles.
4. Once you get several tiles laid in an area, use a board and rubber mallet to set the tile. Place the board across several tile and hit it with the mallet. Do not strike too hard or else you may end up cracking a tile, you only need enough pressure to ensure the tile is firmly set in the mortar.

5. Once all the full sized tiles have been installed, it is time to start cutting tiles to finish the job.

*We laid all the full size tiles in one quadrant of the room and then cut the odd sized ones to finish the quadrant before moving on. I ended up being the tile cutter and my wife was the tile layer. Having these roles helped the work flow smoothly and accurately.

*We still had a problem with one area of the floor that had a high ridge. When we installed the backerboard we tried to smooth this high spot out as much as possible by using additional mortar. We had to do the same thing with the tile. It actually worked very well and that spot which was once noticeably higher than the surrounding floor is all but a foregone memory.

Cutting the Tile
There are two basic types of cuts, full length straight cuts and irregular cuts. The fastest and easiest way to make the full length straight cuts is to use a tile cutter. This tool scores the tile and then snaps it along the score line. After looking at the outrageous prices to buy a wet tile saw and the moderately high price to rent one, I decided to try a different method for cutting the irregular shaped tiles. I purchased an inexpensive ($14) diamond cut-off wheel that fit my 4 1/2" angle grinder. This worked perfectly and for a tiny fraction of the cost of a wet saw!

Most of your cuts will probably be straight cuts to get a thin piece of tile to fit between the wall and the last full tile. Luckily, these are very easy cuts to measure for:
  1. Line up and place a full size tile on top of the last full tile in the row.
  2. Place a tile vertically against the wall.
  3. Place another full tile on top of the tile from step 1, but move this tile over so one of its edges is flush against the the vertical tile.
  4. Using this tile as a guide, draw a line on the tile from step 1. This is your cut line.
  5. Use the tile cutter to score the tile along the line and then snap it. The piece you cut will fit perfectly!
  6. Use a file (you can find specialty ceramic tile files at most hardware stores) to remove the sharp edges from the cut.
At first, I had a difficult time making irregular cuts in the tiles. I tried using tile nippers and some other tools without any success. Finally I got an idea; I went and found a diamond cutting wheel for 4 1/2" angle grinders. I purchased the cheapest one with the thought of testing it; I figured if it did not work well I would only be out $14. To my pleasant surprise it worked great!
  1. Using a tape measure and pencil, measure and mark the part of the tile that needs to be cut.
  2. Clamp the tile to a work surface. I placed two small pieces of plywood across two saw horses. Having two pieces of plywood allowed me to use a clamp between the plywood pieces to hold the rear of the tile down.
  3. If the cut lines are straight, cut along one line with the grinder, then rotate the tile and cut along the other line(s).
  4. If you need to cut a semicircle shape out of a tile, you can make cut multiple straight cuts to remove the bulk of the semicircle. Then use the tip of the diamond wheel to form the circle's edge.
Make sure you are outside and wearing old work clothes and eye, ear, and respiratory protection. Since this is not a wet saw, there will be a LOT of dust and most of it seems to end up all over you!

The Tile is Installed, Now What?
Your back and knees are probably sore from all the hard work, so take a 24 hour break, you have earned it! Soak your knees and get a back massage.
Let the tile set overnight (at least 8 hours, we waited longer) so the mortar has enough time to fully set. Avoid walking on the tile for this time.
The next step is grouting the joints.

The Next Step: Grouting the Joints (See, I told you so)
Break time is over! We were exhausted after installing the ceramic tile in our kitchen and breakfast nook. We started early the morning of July 4th (it is nice having the day off work) and worked till midnight. We then had to work most of Saturday as well just to finish laying the tile. The last thing we felt like doing was getting back on our knees to do the grout, but it is the last major step of installing tile.
  1. To ensure an even color, mix all the grout together at once. It should be the same thickness (like peanut butter) as the thinset mortar mixed earlier.
  2. Apply the grout by spreading it over the tiles with the rubber grout float held at a 45 degree angle. The grout should flow into the joints and fill them and the rubber grout float should keep the surface of the tile relatively clean. Do not grout the outside perimeter of the room where the floor and walls meet.
  3. Run the rubber grout float over the floor again to clear any grout that is not in a joint. Make sure all the joints are full of grout.
  4. Use an old tooth brush or other small brush to shape the grout.
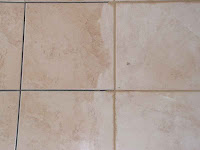
  5. Wait 20 minutes, then wipe the tiles off with a damp sponge. Have a bucket of water handy to keep the sponge moist.
  6. Let the grout cure for a week to ten days. During this time it is safe to walk on the floor but try to do as little as possible. The grout will be especially susceptible to staining at this point.
  7. After the grout has cured, apply grout sealer. There are several methods of application, we chose to purchase an inexpensive applicator which is nothing more than a small bottle with a little wheel that controls the flow of sealant. Read the instructions on the sealer for directions.
  8. Apply silicone caulk around the outside perimeter of the room. I found it helpful to use painter's tape to tape off the floor and wall to make cleaning excess caulk an easy task.
  9. Once the grout sealer and silicone caulk have dried you can mop the floor with specialty tile cleaner to remove any trace of grout or dust from the installation.

*******
At last, we finally had a real floor to walk on! It was worth the time and effort to tile these rooms ourselves. Our total cost for laying almost 300 sq. ft. of porcelain ceramic tile was right around $600. That included all the materials, supplies, and tools. I only lost two tiles during the whole install, so we have two or three full boxes of tiles in a closet that we can keep in case we ever need to repair a section of the floor.

And of course, a couple of photos of the finished floor:

But wait! Our kitchen remodel is not yet done! Things are about to get very interesting...

Friday, April 24, 2009

Remodeling the Kitchen - Part 4

In Part 1 of our kitchen remodeling adventure we saw what we had to work with.
In Part 2, we came up with a plan and started demolition.
In Part 3 we installed the sub floor and removed part of a wall.
In this Part we will prepare the sub floor for the tile by laying cement backerboard.

Here we have the Kitchen and Breakfast nook ready for tile, right? Not so fast! First we need something underneath the tile that support the tile better than plywood - backer board.

We purchased Hardibacker back board from our local Lowes. It came in 3'x5' sheets (you can see them stacked on the floor in the photo above) and we purchased enough to cover 300 sq. ft. (about 8% more than we needed). You will need to lay some sort of cement backerboard before laying tile if the tile will be over a wood or plywood subfloor. If you are laying tile over concrete, make sure the concrete is in good shape without any cracks, humps, or bowls.

Follow the manufacturer's instructions when laying the backerboard. This is how we did it:
  1. Mix some thin set mortar to peanut butter consistancy.
  2. Using a trowel with 1/4" notches, spread the thinset mortar on the subfloor. The "valleys" of mortar created by the notches should have just a thin coat of mortar covering the subfloor. Using the notched trowel will ensure a flat and even application of mortar.
  3. position the backerboard on the bed of mortar. Make sure there is an even bed of mortar underneath the board. Leave a 1/8" gap between boards - you can use tile spacers for this.
  4. Screw the board down while the mortar is still wet. The Hardibacker brand board we purchased already had the screw pattern embossed on one side. If yours does not, put screws evenly spaced about 6"-8" apart. One full sheet of 3'x5' board takes 54 screws. A note on screws: there is a certain type of screw that the manufacturer may recommend due to its self counter-sinking head that screws just under the surface of the board and its extra water resistance. I found regular 2" coarse thread drywall screws, which can be purchased much cheaper in bulk, worked just fine as long as you made sure the head of the screw was flush with the backerboard.
  5. Make sure the seams of the boards do not line up with each other, in other words, do not make a simple grid where four corners meet. Offset the pattern to where only two corners ever meet.
  6. If there are any low spots in the floor or if the floor is slightly out of level, you can use a bit extra mortar to even the surface out. You want as flat of a surface as possible, especially if you are laying large tile!
  7. Use special cement backboard tape (it looks like mesh or drywall tape) and tape and mortar the seams between boards.
I have some additional tips for laying the backerboard:
To cut the backerboard, use a carbide tipped knife to score the board. With the board well scored, snap it along the score. Traditional cement board can contain asbestos and even the newer types of backerboard that do not contain asbestos are still dangerous if you inhale dust particles. This is why you should cut the boards outside if possible and avoid using any cutting method that creates dust, like sawing. If you have to cut a lot of board, you can use a carbide blade in a circular saw but be sure to wear proper eye, ear, and respiratory protection! If you have never tiled before, working with the backerboard and mortar is good practice for the upcoming job!

Here is our kitchen and breakfast nook with the backerboard laid down and ready for the tile.

Our next installment of our kitchen renovation will be laying the tile. At this point of the project you should be excited about almost having the floor finished.!

Friday, April 17, 2009

Remodeling the Kitchen - Part 3

In Part 1 of our kitchen remodeling adventure we saw what we had to work with.
In Part 2, we came up with a plan and started demolition.
In this Part we will explore the floor, or at least the subfloor!

After the old sub floor had been removed and before the new sub floor could be installed the floor had to be leveled. Our house has settled towards the center leaving the outer edges higher than the middle. In most rooms the incline is not very noticeable, however the slope of the kitchen and breakfast nook were rather pronounced.
We briefly entertained the thought of having the center of the house jacked up and installing new support beams, but the myriad of problems that could have caused quickly extinguished the thought. Instead, we leveled the kitchen and breakfast nook floors by laying wooden boards perpendicular to the floor joists. These boards were ripped and cut at the proper angle to level the floor.

After the leveling boards were in place, a new subfloor of 5/8" thick OSB tongue and groove plywood was installed. This created a very strong and solid subfloor suitable for our ceramic tile installation that would take place shortly.

With the new OSB subfloor in place, it was time to tear down part of the wall that separated the kitchen from the beakfast nook. Before beginning, I had to remove an outlet, so I turned off the circuit at the breaker box and then removed the outlet. Next, I removed the molding and casement from the kitchen-breakfast nook transition. On the breakfast nook side of the wall section was a small pantry built into the wall studs. I removed the door and then only had to remove a couple of 2x4 studs and the 3/4" thick wood paneling on the kitchen side. To finish the job I used a reciprocating saw (sometimes called a 'sawzall') to cut through the wood and nails left in my way.

The breakfast nook along with the other rooms at the back of the house are part of an addition. When the house was first built, it looks like the kitchen had double doors that opened to the outside. The amount of wall I had removed brought that wall back to its original opening, except instead of double doors opening to possibly a grassy yard, it enters the breakfast nook room. I was not yet finished with the wall though, I had to get a metal electrical junction box and reroute some wires that had been in the old section of the wall. I put that in a cavity that would be enclosed when I put the new casing and molding up. I also had to cut a section of OSB plywood to complete the new subfloor (the section highlighted in blue in the photo to the right).


Here you can see the kitchen and breakfast nook with the new OSB subfloor. I've also highlighted where the old wall came to. I think you'll agree that the space is much more open now!

Here is another view from the breakfast nook looking into the kitchen:


We now had the floor level and a new subfloor installed. The next step? Starting the tiling project.

Friday, April 10, 2009

Remodeling the Kitchen - Part 2

This is a continuation of our kitchen renovation story. In Part 2 we will explore the ideas my wife and I came up with for our kitchen remodel and we'll start the demolition!

The Plan
We decided that the old floor had to be leveled and the green vinyl had to go. In its place we wanted something sturdy, easy to clean, and classic. It also had to be something we could install ourselves. With that set of prerequisites we settled on laying ceramic tile. Although we didn't know with certainty what exact tile we were going to use, we knew we wanted something light and natural looking. Having light colored floors, walls and ceiling help make a room feel more open and the natural look of the tile would compliment the traditional feel associated with the rest of the house.

The old cabinets also had to go. The base cabinets were simply unbearable and had to be replaced. After a lot of thought I decided I would take the challenge of making my own set of cabinets - even though I had no tools or wood working experience (more on this later).

We also wanted to enlarge the opening between the kitchen and breakfast nook. At one time the transition between the two rooms had been wider, but previous owners added to the wall to make room for the refrigerator. We didn't like how that extra length of wall and the placement of the refrigerator created a distinct separation of the two rooms.

The Demolition
The first phase of our kitchen remodel was ripping out the old sub floor. In order to accomplish this, the old base cabinets had to be removed, all the appliances moved out, and the old floor ripped out. Underneath the green vinyl were a couple of other layers of vinyl flooring, and under those was the original tongue and groove plank sub floor.

We decided to keep the sub floor boards that were still in good shape since they were original and could be used to patch or re-floor rooms in future remodeling projects.

Here you can see the old sub floor being removed and the floor joists underneath. Our house was built over a crawl space, but unfortunately, needed a little extra support. We had a new support beam installed over a poured concrete footer to add some more strength to the new floor.

Here is a pile comprised of the old vinyl flooring that covered the kitchen and breakfast nook. I shed no tears to see it piled up waiting for a trip to the dump.

In the next installment of our Kitchen Remodel blog, we'll cover laying the new subfloor!

Friday, April 3, 2009

Remodeling the Kitchen - Part 1

When we purchased our current house we knew it would need some work. Out of all the rooms in our 110 year old house, the kitchen and adjoining breakfast nook floors had the most pronounced incline from foundation settling, so we chose to start our renovation efforts with these two rooms.

On the left you can see three photos of the kitchen as it was when we first moved in. We quickly assembled a (mental) list of pros and cons for the kitchen.


Pros:
-We like the old wood paneling. The panels are a full 3/4" thick which is about twice the thickness of wood paneling you can buy from the big box home improvement stores today. The knotty pine also adds to the house's country charm.

-The fireplace and mantel are great additions to this kitchen's turn-of-the-century country atmosphere. Although the fireplace does not work, it serves as a great focal point for the room.

-The built-in shelf and cabinet in the NE corner of the room (adjacent to the fireplace).

-The space, the kitchen is roughly 250 sq. ft. which, although not huge, is ample space for our hard working kitchen.

Despite the cheery pros, there were some major cons that desperately needed to be addressed.

Cons:

-The floor angles from the high point along the outside wall down about 5" towards the center of the house.

-The dark green vinyl floor absolutely had to go!

-The base cabinets were under standard height to accommodate a previous owner who was in a wheelchair. This made it very awkward to work at the counter top and was literally a pain in the back. The cabinet drawers were also shoddily made and the layout and flow led to vast areas of unusable cabinet space.

-There did not seem like a great place to put the refrigerator. It looked as if previous owners in April of '56 (I found a signed board leading me to that date) extended the wall about a foot to make a place for the frig. This made a great work triangle between the frig, oven, and sink, but it also made the room feel a lot smaller and visually separated the breakfast nook from the kitchen.

With those thoughts floating around in our heads we came up with some ideas to address the worst offending issues. In short order I had made some conceptual drawings illustrating our most popular ideas for renovation.

In our next installment we'll explore the plans we came up with and start demolition!