
Installing Ceramic Tile
In Part 1 of our kitchen remodeling adventure we saw what we had to work with.
In Part 2, we came up with a plan and started demolition.
In Part 3 we installed the subfloor and removed part of a wall.
In Part 4 we prepared the subfloor for the tile by laying cement backerboard.
In this Part we will install the ceramic tile!
Before a single tile can be installed it must be purchased. Sounds simple, right? It is simple if you know what to buy. There are a couple of things to keep in mind when purchasing tile for your renovation project.
- Size of the tile
- Type of tile
- Color of tile
- Tile layout plan
*Remember to purchase floor tiles; floor tiles are thicker and provide better traction than wall tile.
.The size of the tile depends on the size of the room it will be installed in. If the tiles are too small for the room the percentage of grout lines to tiled floor could become too high and create a distracting pattern. On the other hand, tiles that are too large for the room can also look out of place. If you are not sure what size tiles you want there are a few things you can do that will aid your decision:
- Ask an employee at a tile shop or home improvement center for advice
- Look at other tiled rooms or rooms with vinyl floors with tile patterns
- The most common tile size for most medium sized rooms will be about 12"
- Smaller rooms, such as bathrooms, usually have 6" - 12" tiles
- Large rooms with lots of open space can have 17" or larger tiles
 options are only limited by your creativity. The most common and the simplest layout is the grid design. You can also take the grid layout and rotate it 45 degrees so that your tiles run diagonally across the floor. Yet another popular layout is offsetting the tiles much like the layout of a brick wall. In addition to designs using one type of tile, you can incorporate boarder tiles, different colored tiles, or tiles set 45 degrees from the surrounding tiles.
We decided to use the simple grid pattern because it matched the simple country look we wanted for our new kitchen.
After finding the perfect tile at the perfect price at a home improvement store, we put the 1/2+ ton of tile, mortar, and grout in the back of our truck and drove home, eager to finally have a real floor in the kitchen.
The Layout
You want the tile to be centered and run square to the room. It will be noticeable if it is off center or is not square to the room.
1. Measure along one of the walls and find the center point. Mark this point, then do the same with the opposite wall. When you have the two points marked, snap a chalk line between the points, essentially dividing the room in half. Do the same with the other two walls. You should now have two chalk lines running perpendicular to each other and intersecting in the center of the room.
2. Dry lay a row of tiles along each chalk reference line. Keep in mind to leave a gap between the tiles the same distance you want your grout line thickness to be. We used 1/8" plastic tile spacers (sold at hardware stores) to ensure an even gap.
3. Adjust the reference lines as needed to best center the tiles in the room.

Material List
- Tile - you should have 10% more than you need (i.e. if you are tiling a 300 sq. ft. area, you should have 330 sq. ft. of tile on hand).
- Thinset mortar - Use gray if the grout will be dark or white if your grout will be light.
- Grout - There are many color options.
- Grout Sealer
- Silicon Caulk
- Wooden Board
Tool List
- Level - We used a 4' level.
- Goggles - When cutting tile
- Respirator - When cutting tile
- Knee Pads - You will definitely want these!
- Tile Cutter - For making straight cuts along the entire length of a tile.
- Wet Tile Saw or Angle Grinder with Diamond Cut-Off Wheel - For making non-straight cuts.
- Clamps - For holding tile while cutting it.
- Rubber Mallet
- Tile Spacers
- Sponges
- Clean Rags
- Rubber Grout Float
- Notched Trowel - For spreading thinset mortar
- Chalk Line - For making your reference marks.
- Tape Measure
- Large Bucket or Pan - to mix mortar and grout in.
- Caulk Gun - For caulking the perimeter of the room after the tile is laid.
- Mortar and Grout Mixer
Installing the Tile
The chances are astronomically high that at some point you will have to cut a tile to fit a space. I will discuss that later in this post, but for now I will guide you through the process we used to lay our tile floor.
1. First you need to get your thinset mortar prepared. Mix the mortar in a large pan or bucket with water until it is the consistency of thick, creamy peanut butter.
2. We started at the center (where our new chalk reference lines were) and worked in one quadrant of the room at a time. Spread some mortar onto the floor with the notched end of your trowel. There should barely be any mortar in the valleys created by the notched trowel. You should spread it so that the notches create even rows.

3. Firmly place the first tile down. Start laying the tile out, using the spacers in between them, being careful to keep the tiles lined up with each other. Clean any mortar that oozes out in between the tiles.
4. Once you get several tiles laid in an area, use a board and rubber mallet to set the tile. Place the board across several tile and hit it with the mallet. Do not strike too hard or else you may end up cracking a tile, you only need enough pressure to ensure the tile is firmly set in the mortar.

5. Once all the full sized tiles have been installed, it is time to start cutting tiles to finish the job.
*We laid all the full size tiles in one quadrant of the room and then cut the odd sized ones to finish the quadrant before moving on. I ended up being the tile cutter and my wife was the tile layer. Having these roles helped the work flow smoothly and accurately.
*We still had a problem with one area of the floor that had a high ridge. When we installed the backerboard we tried to smooth this high spot out as much as possible by using additional mortar. We had to do the same thing with the tile. It actually worked very well and that spot which was once noticeably higher than the surrounding floor is all but a foregone memory.
Cutting the Tile
There are two basic types of cuts, full length straight cuts and irregular cuts. The fastest and easiest way to make the full length straight cuts is to use a tile cutter. This tool scores the tile and then snaps it along the score line. After looking at the outrageous prices to buy a wet tile saw and the moderately high price to rent one, I decided to try a different method for cutting the irregular shaped tiles. I purchased an inexpensive ($14) diamond cut-off wheel that fit my 4 1/2" angle grinder. This worked perfectly and for a tiny fraction of the cost of a wet saw!
Most of your cuts will probably be straight cuts to get a thin piece of tile to fit between the wall and the last full tile. Luckily, the
 se are very easy cuts to measure for:
- Line up and place a full size tile on top of the last full tile in the row.
- Place a tile vertically against the wall.
- Place another full tile on top of the tile from step 1, but move this tile over so one of its edges is flush against the the vertical tile.
- Using this tile as a guide, draw a line on the tile from step 1. This is your cut line.
- Use the tile cutter to score the tile along the line and then snap it. The piece you cut will fit perfectly!
- Use a file (you can find specialty ceramic tile files at most hardware stores) to remove the sharp edges from the cut.
- Using a tape measure and pencil, measure and mark the part of the tile that needs to be cut.

- Clamp the tile to a work surface. I placed two small pieces of plywood across two saw horses. Having two pieces of plywood allowed me to use a clamp between the plywood pieces to hold the rear of the tile down.
- If the cut lines are straight, cut along one line with the grinder, then rotate the tile and cut along the other line(s).
- If you need to cut a semicircle shape out of a tile, you can make cut multiple straight cuts to remove the bulk of the semicircle. Then use the tip of the diamond wheel to form the circle's edge.

The Tile is Installed, Now What?
Your back and knees are probably sore from all the hard work, so take a 24 hour break, you have earned it! Soak your knees and get a back massage.
Let the tile set overnight (at least 8 hours, we waited longer) so the mortar has enough time to fully set. Avoid walking on the tile for this time.

The next step is grouting the joints.
The Next Step: Grouting the Joints (See, I told you so)
Break time is over! We were exhausted after installing the ceramic tile in our kitchen and breakfast nook. We started early the morning of July 4th (it is nice having the day off work) and worked till midnight. We then had to work most of Saturday as well just to finish laying the tile. The last thing we felt like doing was getting back on our knees to do the grout, but it is the last major step of installing tile.
- To ensure an even color, mix all the grout together at once. It should be the same thickness (like peanut butter) as the thinset mortar mixed earlier.
- Apply the grout by spreading it over the tiles with the rubber grout float held at a 45 degree angle. The grout should flow
 into the joints and fill them and the rubber grout float should keep the surface of the tile relatively clean. Do not grout the outside perimeter of the room where the floor and walls meet.
 - Run the rubber grout float over the floor again to clear any grout that is not in a joint. Make sure all the joints are full of grout.
- Use an old tooth brush or other small brush to shape the grout.
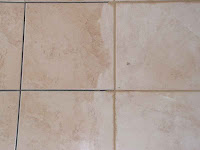
- Wait 20 minutes, then wipe the tiles off with a damp sponge. Have a bucket of water handy to keep the sponge moist.
- Let the grout cure for a week to ten days. During this time it is safe to walk on the floor but try to do as little as possible. The grout will be especially susceptible to staining at this point.
- After the grout has cured, apply grout sealer. There are several
 methods of application, we chose to purchase an inexpensive applicator which is nothing more than a small bottle with a little wheel that controls the flow of sealant. Read the instructions on the sealer for directions.
 - Apply silicone caulk around the outside perimeter of the room. I found it helpful to use painter's tape to tape off the floor and wall to make cleaning excess caulk an easy task.
- Once the grout sealer and silicone caulk have dried you can mop the floor with specialty tile cleaner to remove any trace of grout or dust from the installation.


*******
At last, we finally had a real floor to walk on! It was worth the time and effort to tile these rooms ourselves. Our total cost for laying almost 300 sq. ft. of porcelain ceramic tile was right around $600. That included all the materials, supplies, and tools. I only lost two tiles during the whole install, so we have two or three full boxes of tiles in a closet that we can keep in case we ever need to repair a section of the floor.And of course, a couple of photos of the finished floor:


But wait! Our kitchen remodel is not yet done! Things are about to get very interesting...


